line up

line up
Showing posts with label shirt. Show all posts

26 Oct 2015

A shirt for me not for him

A few weeks ago I was staying at home, being a bit cold. I had bought a nice crisp cotton to make, believe it or not A SHIRT FOR MY HUSBAND!
But he didn't like the motif : "I don"t want anything that looks like flowers". 


So being cold and all, with 3 meters of fabrics and a lot of free time, I set out to make something I could were as well at home as at work (yes yes, I will work again!).


I have lost a few pounds so I had to adjust my block pattern. I had no real problem doing it, except for the sleeve, as usual. 
I am currently reading Sarah Veblen's the complete photoguide to perfect fitting witch was recommended by Peter and I am really happy I bought it. There are some pages dedicated to sleeve fitting, but  I have not yet reach those pages yet. I will definitively study them and fix that wretched problem once and for all!


I feel fine in my shirt, mainly because the fabric is really crisp, but I have made another top since (based on my block patten), in a more flowy fabric and the problems in the shoulder area really show! I have broad shoulders and small arms. The trick is to balance my pattern to make the shirt comfortable, to make the shoulders appears less large and to fit the bicep well but as the same time to not appear too small in comparison to the bust. That's a lot of work, and I really am begging to be really fed up with that problem.

Of course I forgot to remove my hair from the way :-) I made a yoke at the back, with a pleat, because I don't know, I felt like it.

I feel the length is good, it's meant to be a relaxed look. The pleat at the front is just there to had some interest to a rather classic shirt.


I also made a placket opening with a special collar: in French we call it a "col officier", a collar I suppose given the name, that was used in military uniforms. I couldn't really found the name in English. It is not a mandarin collar, it is narrower and the upper part of the collar is rounded and not at a straight angle. It's basically just the collar base of a classic tailored shirt slightly modified.

I bought the buttons a few months back in la droguerie.This shop doesn't exist in Montpellier, I am planning a strike and a public demonstration to express my  utter sadness and demand that one opens immediately!

The buttons are not white but cream, and I believe they go really well with the fabric. Better than white ones. I can't take credit for this idea though. It is just what I had on hand in my tinny travel stash, and I didn't want to buy new ones. A big thumbs up for chance!


I am currently in a shirt making spurr. I think I need some (hard to tell with almost all of clothes still in Brittany) hihi, life is a bit of a mess right now. Anyway, I like this shirt, my husband was wrong and I was right, it's a great fabric for shirtmaking, I just need something to go on top of it now...

cheers!

23 Sept 2015

hi I'm back! (again)


Remember when I said I would post more often? Yeah, it definitly did not happen :-)
But hey, I'm back. And with a twist I did not expect: I live in the south of France now. This means less sleeves and more dresses! And maybe less Breton stripes (darn, I love my stripes).

Anyway, I thought maybe it was time to sew a few things for Autumn, although Autumn here seems to be as hot as summer in Brittany, and also I don't have a job yet, sooooo, what to sew, what to sew ?


Of course the first place I went in my new city is the fabric shop. I know, speak of an obsession. I am so pleased they have a toto soldes as well here. The selection is quite the same as in Rennes, so I was not lost, they also have a coupon selection and couldn't help but rewarding myself for being so brave (you know, leaving my dear Brittany and all) so I bought a few coupons.
The first one I am using is a nice crisp cotton.

The print is quite small, I thought I would make a shirt for the husband, but he didn't like the print. What? I present you with a gorgeous fabric AND I OFFER TO TAKE FROM MY PRECIOUS SEWING TIME AND YOU DECLINE?
Good, more for me hehe.

I made a few sketches to find the right idea, I always do that, it helps me figuring out exactly what I want to make, and also it is a preparation before making the pattern, so that I don't spend too much time on it, trying to experiment with the details.


I chose to make the first shirt out of the three. The fit is loose, with a nice detail at the front: a placket opening and a pleat. There is also a pleat at the back. It should go well with the white trousers I have just finished.
My mum told me it is not really the right color for the season, but the weather is much nicer here, it is still more than 20°c (68°f) every afternoon, so white pants I made! And also I'm in a new city, with totally different weather and I am out of a job, so I don't really know what to sew now, I am just going with the flow :-)


The pieces of the shirt are cut. I have begun construction. It looks good so far. I might have finished it by tomorrow. But what will I do next then?

Stay tuned for more random sewing and existential crisis!
Bises

10 May 2014

Does it go together?


Here are the first clothes I made this year for Spring. Unfortunately I have almost no occasion to wear them! A month ago the weather started to get really warm an sunny, but now it's just rainy and cold. Why?


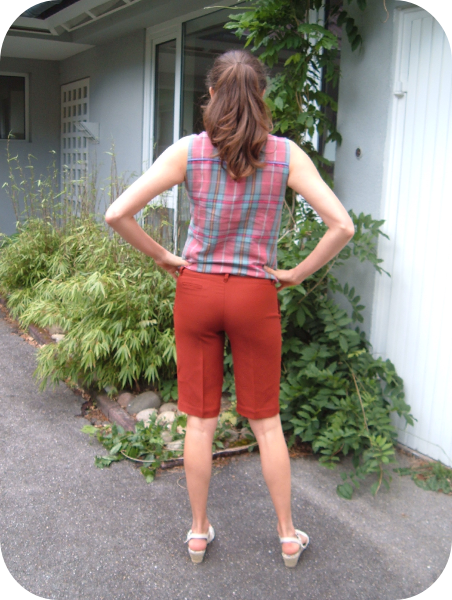
The bermuda is the second I have made. Last year I made the pattern and really enjoyed wearing them by not too warm weather. They really are a staple in my wardrobe, very practical and elegant I find. I intend to wear them in town, better then shorts no?


The fabric is synthetic crepe. It's really a magical fabric: it doesn't wrinkle and has a nice structure. At first I bought it to make a top for Winter and never made it. I have already used crepe for a dress, and I really love it, it moves superbly and looks really chic. It's the kind of fabric you often find in hight end stores, because it holds itself really well.


The back is a bit tight... I have been training and I guess my efforts are paying off.  Have to revise my block pattern!


Construction was easy. I really love Summer sewing: shorter seams!! Yeah! I did Italian pocket and a fake velted one on the back. I like the look of velted pockets but never put anything in them!


For the top I did a simple loose shirt. I like this style, it's breezy! I thought the colors of the bermuda and the shirt would go together but I am not so sure anymore.


I wanted to have "some" design element in it, so I choose to make kind of a cowboy shirt, but without all the bias cuts, I find it too distracting for the eye, I like clean lines.

So I made some piping, always fun.


 I have to say that placing the piping on the curved line on the back was not easy, maybe because you shouldn't do it :-)
So when I stitched the front pieces I used two pieces of piping instead to make a sharper point, worked well and the result looks good.


The fabric gave me some troubles. Can you see in the picture, it doesn't go at all straight! That piece of fabric is perfectly cut on the grain, but it goes all on the side! What a pain. But the fabric is soft, so it's forgiven!


Here is my obsession for this Summer: knots, love it!! Apparently it's what's in this year, don't know, I just like it, and I will make some more. Maybe it's just my love Dirty Dancing that expresses itself?


Come on, I know you love it too, it's the perfect Summer movie! First, Summer, right? And dancing, romance, nice outfits, I really have to watch it again.


Yeah, those colors don't really go together right? Never mind, I still have plenty of time to make something new that goes with both, "sight". Where are you lovely sun?
Cheers

28 Jan 2014

Sticking to my new year's resolutions

Bonjour tout le monde !

As you know, I have vowed to create more current pieces. I felt that the clothes I was making, were a bit old looking, and this is not how I picture myself. So here we go, here is my take on a very current trend in fashion: leather!

new shirt and pants made by me.
My inspiration came from the series "Under the Dome". One of the characters had a nice wardrobe and this shirt struck me as being at the same time elegant and sexy (maybe because of the cleavage:-)).


The shirt has no visible darts and two patched pockets.  Soooo, I tried to make a pattern with no bust dart.

Yes, I roll my eyes! Let me tell you this: it was a nightmare. I don't drape, I create my pattern directly on paper, and the method I know to avoid having a bust dart was not working here, and as I don't know how else to do, I struggled quite a lot to find a way to make it work. Here is the technical drawing of the shirt:

And because a first draft can always be a bit, how can I say it? Challenging. Of course I made a rooky mistake: I didn't measure my side seams and guess what happened? Yep, the front was longer than the back :-(


But you can't see it don't you? Haha, I might not be right each time, but a few years of sewing and a fabulous wool fabric saved me. Did I tell you I realized my error when everything was already cut and partially sewn?

This is how I hid my forgetfulness:
 

First I had a fabulous fabric, bought in Rennes at TOTO soldes, back in November. It's a light wool, a bit sheer, soft, and really warm to wear in winter.

I gathered the front and attached it to the back, then sewed without making any folds. And then, I used my iron to flatten the gathers, and it worked. But I think it's only because the fabric was wool. As we say in French: "ça rentre". Meaning it takes the form that you want. Thank you marvellous fabric!


I decided to cut the collar in only one piece. As it is fake leather it holds on itself fine, Afterwards, I thought I could have done the same for the button hole plackets and the wrist band. But maybe because of the buttons it's better to have two layers.

I don't know why but I wanted to have pockets, but not patched pockets. So this is what I did.

 
I thought that maybe the pockets would show through the fabric, but no, so good for me. I don't think I should put something inside though!
wrist band
I have decided that I should have more shirts. But not like this one, I didn't keep the pattern, because of the problem with the side seams. I will make a basic pattern ( with bust darts!) that I can reuse over and over. A working lady never has enough shirt in my opinion :-)


In conclusion, I really want to make the most of this last months of freedom to built a collection of basic pattern who will be easy to reuse when I'll be back to work. Pants are also on the list. I already have a pattern for my bathing suits (I know, indispensable for work!), I finally have the sleeve ( also a nightmare, must have weird arms), underwear, shorts, Chanel vest. That's not too bad. Now I just have to focus on my goal!
I wonder if other people also built a collection of basic patterns?

à plus tard!

26 Feb 2013

Phase two: Robin Scherbatsky's pleated shirt


Remember my pants? I  realized while making them, that I absolutely needed a nice shirt to go with it, yes, absolutely! As a French women, I have a lack of black clothes, this is clearly an issue that needs mending.
For some time now, Robin in How I met you mother, really has the perfect shirt wardrobe! They are so beautiful, both shape and fabric. Although it really is a bad example for a clothe lover like me. Don't you think the amount of clothes the actors get to wear is crazy? This is the kind of stuff that distracts me from the story because honestly, who has so many outfits? And where does she find the money to buy all this crazy expensive silk shirts? Truly? She should give them to me :-) 

 The firs time I saw this shirt I knew I had to make it. I found the original on shopbop.com. I like to have a good idea of the original shirt. I makes it easier to make the pattern. When making a copy of some clothe I have seen I don't have any rule. Sometimes I make an exact replica (or so I think...), sometimes I just make a pattern with the fitures I find interesting.


 I had a nice viscose piece of fabric waiting to be sewn. I bought it before moving to Germany, it was just 15€ for 3 meters, which in my book is a bargain I just can't pass!
Making a pattern for a pleated clothe requires special techniques. I like very "clean", simple shirts, this is why I always pay great attention to the dart's position. 
In this case, they are hidden underneath a pleat. To do so I  had to move both bust and waist darts from their original position to form a straight line underneath the pleat.

Ajouter une légende


The picture on the left is my basic pattern. See the red dot? This is the bust point, ans the red line is the line where I can make the last pleat. The pleats are to be made between the two dart points.
I cannot have any dart underneath the pleated section, so I moved the  width of the darts to the left and traced as many pleats as I wanted, in this case 4 on each side of the middle line.

Pleats on a fitted or semi fitted shirt can't got any further than the bust point. The reason is obvious, try to do it with a piece of paper, and you will see that it's impossible to form them on a curve.

This is why some designers only use very flat chested women, if you don't really need to have darts to have a good fit, then you can make crazy patterns with pleats and you name it craziness, that are IMPOSSIBLE to recreate for the busty ladies!

I looked at the back of the original on Internet, I didn't really like it but kept it's upper part.


I wanted something a bit interesting, so I thougt I would make open darts, it gives shape and is not too boring like normal stitched darts. The red line on the upper piece is the shoulder line, I moved it a few centimeters, I think I could have added a few more. You live and learn.

The front part was a bit trickier. It takes some time to prepare the pleats. You have to report the marks with chalk, then tailor's tacks,


 then fold, stitch the pleats so that they won't open (that I had forgotten :-)),


see what happens when you don't close your pleats... It opens.


and finally iron them with some cardboard to prevent the fabric from marking. Ouf, that is precise work, but it's worth it.


The original also has as a small opening on the front part, it's very pretty. 


Basically you take a piece of fabric longer than your opening, then stitch around on the right side of fabric, open it with you scissors. With your iron fold the piece of fabric on the wrong side et voilà! You can stitch around the opening on the right side to assure it won't move, it can be pretty nice with fancy embroideries, but I didn't do it. I'm not much of a top stitching person!

Anyone interested by pictures of my sleeves?
  

 Ok, so, more preparation, notches, slashes. Actually, had I stitched them correctly, it would have  been a nice ride. 
But I forgot that I had changed the shoulder seam. And didn't make a mark on the fabric so I attached the top of the sleeve to much on the front of the shirt.  Good old seam reaper was called to the rescue!
Fortunately, I did good with the cuff, the hardest part is to stitch that little opening without making any unintended pleats, i think it can be easy or hard depending on your fabric. This one was nice to me:


Can you see on the first picture, I stitched around the little opening to make it stronger. Then I used a bias tape (not made on the bias, no need). Stitched it to the right side, a bit of ironing to fold it on the wrong side, then attached it by sewing just on the edge, this is why the second fold as to be a bit bigger than the first one.
And a few hours later: tada! 


Well, black is maybe not the best color in picture to see the details...
Close-up?


The lovely buttons are vintage, I bought them in a small haberdashery on the island of Groix in Brittany. There notions are all vintage, coming from an old store who closed maybe 20 years ago! I made a little holdup there before living, although it's really not easy buying notions when you don't know what you are going to use them for.


My photografer seems to have a thing for blurry pictures, what can you do? Anyway I'm very pleased by the shirt it's exaclty like I wanted it, I even did the sort of belt on the front of the shirt, nothing fancy, just a rectangular made with small stitches. I just need to shorten the cuffs, I have really tiny wrists. Better not say too much, this will be part of my next post...

conclusion: happy!! and blurry.