line up

line up

31 Oct 2013

DIY: Christmas gift, a Liberty notebook

Bonjour tout le monde !


Today I am giving you a grate idea for a Christmas present, or just a cool present for yourself, that's the option I chose...
A beautiful notebook covered with liberty fabric.

But first let me talk of my little trip in Germany. I have been living there for a year now, and it's the first time that I go out of my city. Shameful I know, but for my defence, I don't know of any French person who has already been on vacation there. Apart from high-school trips... And last year, well, I visited other places :-)

As you can see my trip was beautiful, lots of mediaval and renaissance houses and castels, and lost and lost of sausages!!! this is NOT a cliché, Germans really love theirs wurts, and bear, and wine. Did you know that? Germany produces wine, you can even find viniards inside the walls of small cities, very lovely.

Anyway, now that everybody knows that Germany is beautiful, let's dive in this week post: a gorgeous and inexpensive Liberty notebook for Christmas.

Ah, Liberty... Love those fabrics. Last year during a trip to London I bought a notebook for my mom at the Liberty shop.

photo by Luis Villa del Campo

But I found that although it was a nice gift it was still a bit expensive, and didn't buy one for myself. What a sad story, I know.
Then, looking at my stash of fabric the other day, I noticed some Liberty remaining from previous projects. The pieces left are really too small to make anything other from them than pockets OR: a splendid notebook! And it's so easy to make!!


First of all, excuse me for the blurry pictures, sometimes my camera just doesn't feel it, you know: "Blah, tired of taking pictures."

What you need: 
 

a note book
cissors
glue
fabric(not to light so that the pattern of the notebook won't see through)

Cut a piece of fabric large enough to cover your book, adding 1,5 cm around to fold it to the exact size of the book.Iron it like in the blurry picture.


Then glue like a mad person, all over the first outside cover. Do not leave a piece of it without glue, or the fabric will rinkle. Then put some glue on the inside edge and fold the fabric over it.

For the bidding part: cut your fabric up to notebook, on each side of the bidding. fold inside, and glue like a mad person...


 And again, glue the other cover, remember that there shouldn't be any wrinkle anywhere. Arrange the corners as you wish. My notebook has round corner, but I made them square. It's just easier.

Now you should have a beautiful on the outside notebook. But your work is not finished. Seamstresses know this: your work has to be as beautiful on the inside as it is on the outside.

So, you have to glue the first page of the notebook to the inside cover, to hide the fabric that you glued on it
In my case I had to cut the first pages who were partially glued (not by me but by the manufacturer) to the cover. And then glue a page over this mess.


See, does it make more sense in picture?
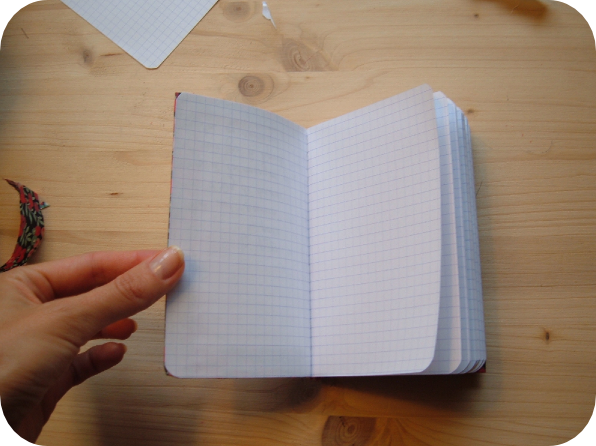
Et voilà!! It's so easy I don't understand why I never made that before!!
You can even add some ribbons. Just place them between the inside cover and the first page, and you know the rest: GLUE LIKE A MAD PERSON!!!


 I am so in love with it I want to carry it above my head in the street so that people can worship it! What can I do? I have a thing for Great Britain and Liberty fabrics is just it for me.
I hope I find some time to show what I am currently working on, maybe a photo-shoot in France would make up for the lack of posts this month. What do you think? 

Cheers!

14 Oct 2013

DIY: a fake bow

Bonjour tout le monde !

Today I have decided to share with you a little tutorial on how to add a cute bow to your garment.
I have a trip planned ahead, and of course I need new clothes. I had a nice stretch wool in my stash and some viscose. Those fabrics are comfortable and make a nice ensemble for a diner out after a day visiting.


Actually the pants are a copy of an old favourite from ZARA. I was able to find almost the same fabric, but in another colour of course!
For the pictures I wore heels, but until I get back to work I will wear my pants with flats more probably, it's why the pants appear a bit too short in the pictures. Didn't realise that before...

Man, the weather was really crappy for taking pictures, sorry!

Let's get to the bow now:

This is a nice feature, romantic and most important: it's fun to make!
I also made bows on my sleeves, so cute!


See why I call them fake bows? It's technically a dart.

As usual you need to take your basic pattern.

For my top I decided to move the bust dart to the side. For that, trace on your pattern the new bust dart (in red). Close the "old" dart  by folding the line on top of one another and pin them in place.
Then slash the new dart.

Draw your bow, slash those darts open. Then the tricky part: you have to decide the depf of your darts, mine are 4 cm wide. It's just a question of taste, there is no way of knowing how many centimetres you need. You can play around with you fabric to estimate the final look of you bow.
When you have decided of the size of your darts take a piece of paper to tape under to maintain your darts in position, like below.


This is my final paper pattern. I used a ruler to  show you that your center front should be placed en the fold. Mark precisely your darts and then stitch the sort of V created buy the creation of your darts. Do you follow?


Then to create the illusion of a bow, take a small piece of fabric that you have prepared before ( fold it in 2, stitch the big side, turn it around). Then place it in the crease of one of the darts (above). Fold your dart, stitch it (blue line). Repeat on your second dart.

 Then you should stitch buy and on three centimetres your darts so that you bust dart isn’t too low. It happened to me, I was quite surprised because I thought my pattern was perfect.


There you go, you should have a nice and fake bow!!


Picture of the inside because I know you love it, I know I do.


 I used self made bias to finish the collar and sleeves. Stitched the first side with my machine and the second by hand so that it would be invisible.
The rest of the seams are French seams because the fabric is rather light, and I find it give a nice finish.


Oh and look, it even goes with my Chanel jacket that I made a few months ago, isn't it perfect? what you don't see my top, well yeah! It's the point, it goes perfectly with it's neck line.


This is what is really cool when you are drawn to certain colour, you find yourself having a real wardrobe with pieces that go well together (or a least I hope they go well together :-)).


That's all for today. See you in few weeks, when I get back from my trip.

Cheers!

25 Sept 2013

Good bye Summer

Hi everyone !

I thought I ought to have a last post before Autumn to make a little review of my very sunny Summer.
As I spent most of my time outside to enjoy the marvelous weather, I don't have a lot to show. Just a few basics that I thought would be very useful, and they were.
Lazy girl!
 So, there we go, summer sewing:
A little walk on the wild coast

We had really few days without sun. During those I wore my bermudas. But they seemed too long, so I chopped them of 3 cm. And they felt immediately younger.
I also made a long sleeved T-shirt inspired by a local manufacturer: Armor Lux. It is so popular, that we almost look all the same with our striped t-shirts, it's really silly when  you think about it: villages full of striped clothed, bad haired people! Yes we tend to have our share of wind, hence the impossibility to keep a perfect hairdo.

After I cut them, better no?
Do you have megaliths as well ?

Then, I made a few things for those incredibly warm days:
A bathing suit! Well, in fact two, but I am waiting for my mother in law to send me the pictures of the other one. Not a big loss thought. It's basically the same model. This one is the second I made.


I prefer to wear it without the tie in the middle but it's more practical for swimming.
The first time I wore it, I had my parents in stand by with a towel in case I had a major shameless incident while going out of the water :-) I am very pleased to report that the lining did it's job.
In order to nail the top part, I used an old skanky jersey dress as a muslin. I took it back here with me to try other forms. And for the bottom I just copied an old one I love.


I also made a pair of shorts based with the same pattern as this one. It is very rare that I use the same pattern twice, but shorts are essential to me during summer, and I always need a white one. It's fancy and it enhances my tan! I know, I'm shallow when it come to my clothes!

It is made of a stretchy fabric. Don't know what exactly. I think I found it in a box of pre-cut fabrics at my favourite fabric shop in Rennes: TOTO SOLDES.


Because of the stretch I omitted the zipper. But added two velted pockets at the front and two at the back. But only the front ones are real. The back ones are just for show.

Then, I used a small piece of liberty fabric I had for a year in my stash to make this so cut top:
A simple V shape for the front. Diagonal darts for the bust ones. The house in the background is so lovely don't you think?


Can you see the crocheted curtains on the windows? They are traditional on the island of south Brittany, and so sweet. 

And finally, the best part: the bare back! I just made tiny bias straps and attached them under the arm to prevent any gap. This is a great top for warm weather. I think that using liberty fabric makes is more romantic and elegant. Had I used an other fabric, it may have come across as vulgar. Maybe I should try :-)
To finish the edges I also used some self made bias of the same fabric. I wondered if I could have used a contrasting fabric. It could be a good idea for a black and white one. Could give it a bit of a Chanel edge.


 The pattern posed a small problem. It was too large on the sides. I think because it was not hanging from the shoulders it was necessary to remove 3 cm on each side to have a good fit. Not too hard to do, except when the side of your garment is not straight. A picture is always better to understand no?


The red line are my new side seams, see the problem? I had to trace a new underarm line, it made this part of the top a bit lower than I wanted to, but hey, who knows? And I think it looks good anyway, so, I don't care.

That's all for summer. A bit short isn't it? Finally we had this kind of weather for only two months. Now I have to put my mind into Autumn sewing.
The change of seasons always makes me wondering for a few days. For Autumn, I like to think about the UK, you know, miss Marple, Downton Abbey, that sort of things. And eventually my pattern making mojo comes back, and I run to the store to buy plaid fabric!!

Anyone still in summer mode or is the weather so terrible where you live that you are already wearing socks? I know I did last week!


Cheers!

18 Sept 2013

buttons, buttons!


Hi everyone!

I said in my previous post that I would talk to you about making swimsuits, BUT IT'S FREAKING COLD OUT HERE!!!
I just cannot bring myself to making a new one or photographing the ones I made this summer. Winter is coming friends, and in Kaiserslautern it seems like it's already here...

So I decided that instead I would make a quick post about the new mission I am invested in: building my stash!!!
I am soooooo into this new occupation. But hey don't judge me, I am just copying what others do! And also, I need it.

After Caroline wrote about hers, I knew that I needed to create my own. I mean, if you don't leave next to your fabric shop like I did (sight...), it means you have to buy in bulks, fabric, notions, everything, if you don't want to waste your precious sewing time going out for a stupid zipper or buttons!

This is why I begun buying buttons, lots of them.
I am super lucky to spend my holidays in the small island of Groix, witch beside being beautiful has an haberdashery. And this is really super lucky because the Island is just 4km X 8!
It's called la petite fabrique, they sell clothes that they make, AND most important, they have an important collection of vintage buttons, zippers, elastics, and more that I am not even aware of, because there are things everywhere in this shop. I love it!

 This is what I bought last year.


 I also have them in navy!


 pearls I used is this project and in this one too.


Aren't those bicycles splendides?


 Soo beautiful no?

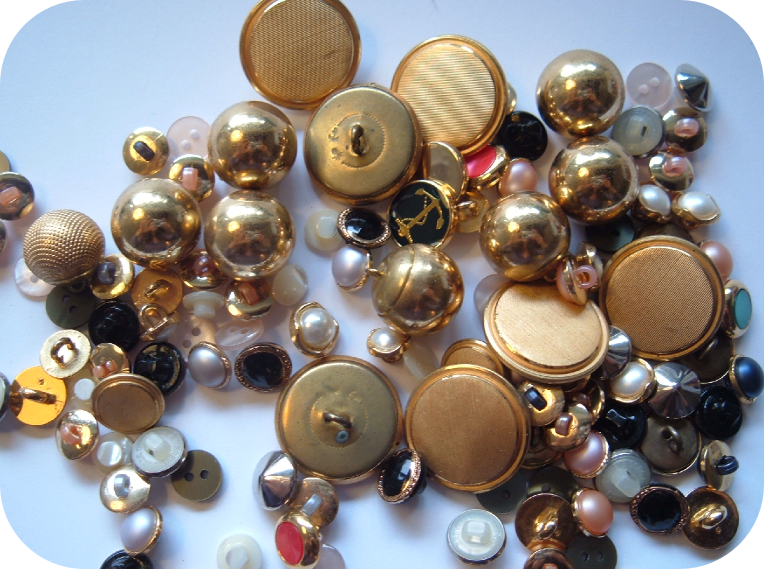
They are so beautiful and shiny! This is why I couldn't leave the island this summer without buying some new one. Because they are vintage, if I don't buy them and someone else does, then they are gone forever. See, I HAVE to buy them.

This year selection is more varied, I tried to pick out colours I like and use. It's not easy to select the buttons before the fabric. But I had no other choice.
I knew I would certainely want to make shirts or blouses. This is why I picked some small ones. And the big ones are for a coat I will try to make, and because, well, they're just soooo nice!!

More eye candy?


 Look at that! And did I tell you they are not expensive????


Cheers everybody, and buy button, lots of them, it's good for you!!